When I first saw the video, it looked like magic. A woman in leggings knelt on the dirty bathroom floor, mixed three common ingredients in a bowl, spread the paste on her yellowed grout and wiped. The lines between her tiles became bright white in just a few seconds, almost blinding. People went crazy in the comments: “Game changer!” “No more expensive cleaners!” “I wish I had known this sooner.” You could almost smell the bleach and lemon through the screen.
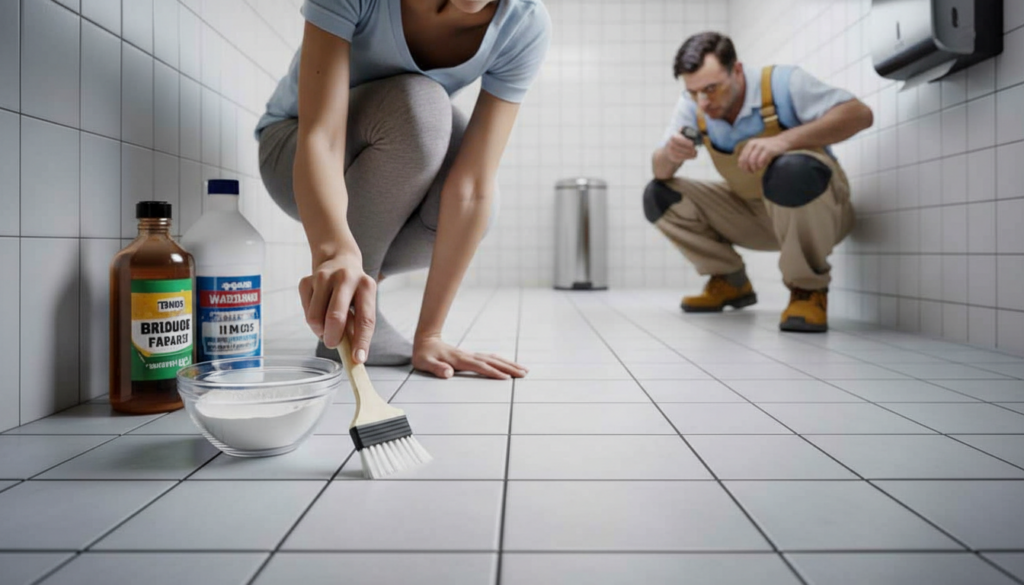
A tile installer I know saw the same clip a few days later and literally winced. He stopped on the close-up of the mix, zoomed in, and said one word: “Disaster.” He knew right away that the three things were baking soda, bleach, and vinegar—the holy trinity of “miracle grout hacks.” Yes, it’s cheap. It seems to be fast. But he had already seen what happens three months later, when the grout starts to break down like old chalk.
People on the internet say it’s genius. Many professionals quietly call it a dangerous scam.

Why the “3 cheap ingredients” grout trick went viral online
The trick is very easy to do. You scroll down and see a bowl, three things that are probably under your sink and a floor that goes from boring to beautiful in less than 30 seconds. No hours of scrubbing on your knees. No expensive cleaner from the hardware store. A quick paste and a brush stroke, and all of a sudden you’re in a renovation ad.

People like this kind of content because it speaks to something very human: we’re tired, we’re busy, and dirt builds up on us. Your kitchen grout looks “a bit off” one day and like the floor of a tube station the next. These videos come at just the right time, promising that if you pay very little and do very little, your home will look like it is ready to sell. The pictures of before and after really made you feel proud.
But tile pros and chemists are getting more and more worried behind the views and likes. They see the same three-ingredient mix showing up all over the place, with only small changes each time, but almost always with the same main problem. The recipe looks safe because it says “non-toxic” or “natural.” The truth is that a cocktail can let out chlorine gas, remove sealants, make porous grout weaker, and lead people to costly repairs. The trick works, at least for now on camera. The damage doesn’t show up on camera until later.
What is really in that viral grout mix?
Let’s go over the usual “miracle” recipe, since it almost always comes back to the same three things. First, use baking soda for its “scrubbing power.” Second, use chlorine bleach to make things whiter. Third, add vinegar or lemon juice to the mix to “activate” it. Some videos add a squirt of dish soap, while others add a drop of essential oil to make it “smell clean.” That’s the story told in a friendly way, like at the kitchen table.
From a chemistry point of view, it’s a different story. Bleach and an acid like vinegar or lemon juice can react to make chlorine gas, even in small amounts at home. You probably won’t pass out on the bathroom floor, but that sharp, “catch-in-your-throat” feeling that some people talk about? That’s not “deep cleaning.” Your lungs are protesting. The gritty baking soda also gets into the porous surface of the grout. It cleans, but it also makes more tiny holes for dirt and moisture to get into later.
To keep stains from getting on them, many grout lines are sealed. Household acids can slowly remove those sealers, especially when they are rubbed in with rough pastes. The grout looks snowy white at first because you just bleached and scraped the top layer. A few weeks later, stains stick better, water flows through faster, and the grout gets more brittle. Then, especially in showers and around sinks, hairline cracks start to show up. The plain-truth line that professionals keep saying is simple: “You’re giving up long-term durability for a short-term photo moment.”
What experts really do to save tired grout
Tile installers and professional cleaners don’t just grab three random things from the pantry and hope for the best. They usually start with a pH-neutral or slightly alkaline cleaner made for tile and grout, warm water, and a stiff nylon brush. This is not very exciting. There were no bubbles, no white clouds, and no fragrant steam. Just moving slowly and over and over again. They work in small areas, let the cleaner sit for a few minutes, and then scrub along the lines until the original colour starts to show through.
If the grout is badly stained but still strong, a lot of pros go up step by step. They could switch to an oxygen-based cleaner that uses sodium percarbonate to lift organic stains without making strong smells. They don’t use messy DIY cocktails for mould or mildew; instead, they use carefully diluted, single-purpose products. Then they rinse, not just wave a wet cloth, but really rinse. They often use a penetrating sealer after the surface is dry to make the next cleaning job less difficult.
The real “pro secret” isn’t flashy at all. Grout is a porous, cement-based material that needs to be treated with respect, not chemicals. It eats too much acid. It wears out too quickly. Mould can grow if there is too much moisture and no sealing. Professionals care less about how white their lines look on Instagram and more about how stable, water-tight, and consistent they are. They want your shower to look nice and not leak into the ceiling below in two years.
A safer, still-affordable way to clean grout without damaging it
You don’t have to give up on cheap, easy cleaning if you like it. You just have to get rid of the dangerous part. Fill a spray bottle with warm water and a little bit of dish soap. Spray the grout and let it sit for 5 to 10 minutes. Then, use a firm nylon brush or an old toothbrush to scrub it. Wipe it down with a clean cloth and then rinse it with plain water. It is slow, but you will see improvement over time without hurting your nose or your grout.

If you have tougher stains, don’t mix baking soda with bleach or vinegar. You can either sprinkle it on wet grout or mix it with water to make a paste. Spread it out, let it sit, scrub it, and then rinse it well. Use a bathroom cleaner made for this purpose or a very weak bleach solution on its own in a well-ventilated area, and never mix it with acids. And when the grout is clean and completely dry, think about using a simple penetrating sealer that costs less than $20 and can help you go longer between deep cleanings.
In one sentence, a tile cleaner I talked to said:
“I don’t make as much money when people clean their grout right, but I sleep better knowing their shower won’t leak behind the walls.”
People who take shortcuts keep running into the same problems:
- Mixing random chemicals “to boost the effect,” not knowing that the fumes and damage they cause last a long time.
- Using metal brushes or super-abrasive pads to scrub that literally carve away grout.
- Not rinsing off the cleaner, which leaves behind residue that attracts more dirt.
- Never sealing grout in places with a lot of moisture, which makes stains set in quickly and deeply.
- Waiting years between real cleanings and then trying nuclear solutions at the last minute.
The “3 cheap ingredients” trick won’t die, even though pros have warned us about it. This is because it speaks to both our tiredness and our hope. When we look at photos at night when it’s quiet, we want our homes to look like those photos. We also don’t want to spend our only free Sunday cleaning the grout until our wrists hurt. We’ve all had that moment when you think, “I’ll feel better if I can just fix this one ugly thing quickly.”
Most cleaning influencers know this, and most of them are not trying to be dishonest. They try something once, see a bright white line where there used to be grey, and then they hit upload. What the camera can’t show is the smell, the fumes, the tiny cracks that are slowly forming in the grout line, and the missing sealer that won’t protect it next month. To be honest, no one really does this every day. These are not maintenance routines; they are stunts.
The deeper question remains: are we willing to give up some time and patience for answers that won’t come back to haunt us later? Or will we keep looking for the next viral mix, which is always louder and “miraculously” faster than the last? The floor might look great right after you wipe, but the bill—whether it’s for money, things, or even breathing—often comes quietly, long after the video has stopped playing. That’s the part that no one is filming yet.
| Key point | Detail | Value for the reader |
|---|---|---|
| Viral mix risks | Bleach + acid can release chlorine gas and weaken grout | Avoid hidden health hazards and costly tile repairs |
| Gentle methods work | Soap, water, oxygen cleaners, and careful scrubbing clean safely | Keep grout looking good without sacrificing durability |
| Think long term | Cleaning, rinsing, and sealing extend grout life significantly | Save money, protect your home, and reduce renovation stress |
FAQ:
Question 1: Is it ever safe to mix bleach, vinegar, and baking soda for grout?
Question 2: What’s a simple, safe way to clean dirty grout?
Question 3: How often should I really clean and seal my grout?
Question 4 : My grout is already falling apart. Can cleaning it still help?
Question 5: Why do my grout lines get dirty so quickly after I clean them?
