Yoga is not only great for mental peace but also plays a pivotal role in maintaining spine health and flexibility. With today’s lifestyle often being sedentary, yoga provides an effective way to combat stiffness, reduce back pain, and improve overall spinal mobility. Below, we’ll explore the essential yoga poses that can enhance your spine health and flexibility.
Why is Spine Health Important?
A healthy spine is essential for overall well-being. It supports the body, allows movement, and houses the central nervous system, which affects all parts of the body. Regular yoga practice can help prevent spinal issues like stiffness, misalignment, and chronic back pain. Yoga poses that focus on lengthening, stretching, and strengthening the spine can promote flexibility, reduce tension, and increase mobility.
Key Yoga Poses to Boost Spine Health
1. Cat-Cow Pose (Marjaryasana-Bitilasana)
The Cat-Cow pose is a gentle flow between two poses that stretches and strengthens the spine. It improves flexibility in the neck, spine, and shoulders while promoting better posture.
# How to do it:
 Simple Morning Hydration Habits That Support Clearer Skin and Higher Energy Throughout the Day
Here’s a step-by-step guide to help you complete this task successfully.
**Getting Started**
Before you begin make sure you have all the necessary materials & tools ready. Check that your workspace is clean and organized. This preparation will save you time and prevent mistakes later.
**Step 1: Understand the Requirements**
Read through all the instructions carefully from start to finish. Don’t skip ahead or assume you know what comes next. Take notes if needed and highlight any important details that stand out.
**Step 2: Gather Your Materials**
Collect everything you’ll need for the project. Make a checklist if the task involves multiple items. Having everything within reach means you won’t have to stop midway through to search for missing supplies.
**Step 3: Follow the Process**
Work through each stage methodically. Don’t rush or try to take shortcuts. If something seems unclear stop & review that section again. It’s better to spend extra time understanding than to make errors you’ll need to fix later.
**Step 4: Check Your Progress**
Pause occasionally to review what you’ve completed. Compare your work against the instructions to ensure you’re on track. This habit helps catch small mistakes before they become bigger problems.
**Step 5: Complete and Review**
Once you finish go back through everything one final time. Look for any steps you might have missed or areas that need improvement. Make adjustments as necessary until you’re satisfied with the result.
**Tips for Success**
Stay focused on one step at a time rather than worrying about the entire project. Take breaks if you feel tired or frustrated. A fresh perspective often helps solve problems more easily. Ask for help if you get stuck instead of struggling alone. Remember that practice makes perfect. The more often you do this the faster and better you’ll become at it.
- Start on all fours, with your wrists aligned under your shoulders and knees under your hips.
- Inhale as you drop your belly toward the floor, lifting your head and tailbone (Cow pose).
- Exhale as you round your back, tucking your chin toward your chest (Cat pose).
- Repeat this flow for 10-15 rounds.
Benefits: Enhances spine flexibility and reduces tension in the back and neck.
2. Child’s Pose (Balasana)
Child’s Pose is a restorative pose that gently stretches the back, hips, and thighs, promoting spinal alignment and relaxation.
# How to do it:
Here’s a straightforward approach to get started. First you need to gather all the necessary materials and tools before beginning the project. Make sure your workspace is clean and well organized so you can work efficiently. Start by reading through all the instructions carefully from beginning to end. This helps you understand the complete process before you actually start working. Many people skip this step and end up making mistakes that could have been easily avoided. Next prepare your materials by measuring and cutting them according to the specifications. Double check your measurements because accuracy matters a lot in the final result. Take your time during this stage rather than rushing through it. Begin assembling the components in the order specified in the instructions. Work methodically and don’t jump ahead to later steps. Each step builds on the previous one so following the sequence is important. As you work keep checking your progress against the instructions. If something doesn’t look right stop and figure out what went wrong before continuing. It’s much easier to fix problems early rather than after you’ve completed several more steps. When you finish each major section take a moment to inspect your work. Make sure everything is secure & properly aligned. This quality check helps ensure the final product will work as intended. Finally test the completed project to verify it functions correctly. Make any necessary adjustments & enjoy the satisfaction of completing the task successfully.
- Begin in a kneeling position with your knees spread wide apart.
- Slowly lower your torso towards the floor, extending your arms forward or resting them by your sides.
- Hold for 30 seconds to 1 minute, focusing on deep breathing.
Benefits: Relieves tension in the back, elongates the spine, and provides relief from stress.
3. Downward-Facing Dog (Adho Mukha Svanasana)
Downward-Facing Dog is a classic yoga pose that lengthens the entire spine and stretches the hamstrings, calves, and shoulders.
How to do it:
- Start on your hands and knees. Lift your hips toward the ceiling, forming an inverted “V” shape with your body.
- Keep your hands shoulder-width apart and feet hip-width apart.
- Hold the position for 30 seconds, trying to push your heels towards the ground.
This pose stretches and strengthens your back while helping to align your spine properly. It also works to increase flexibility in both your legs & shoulders.
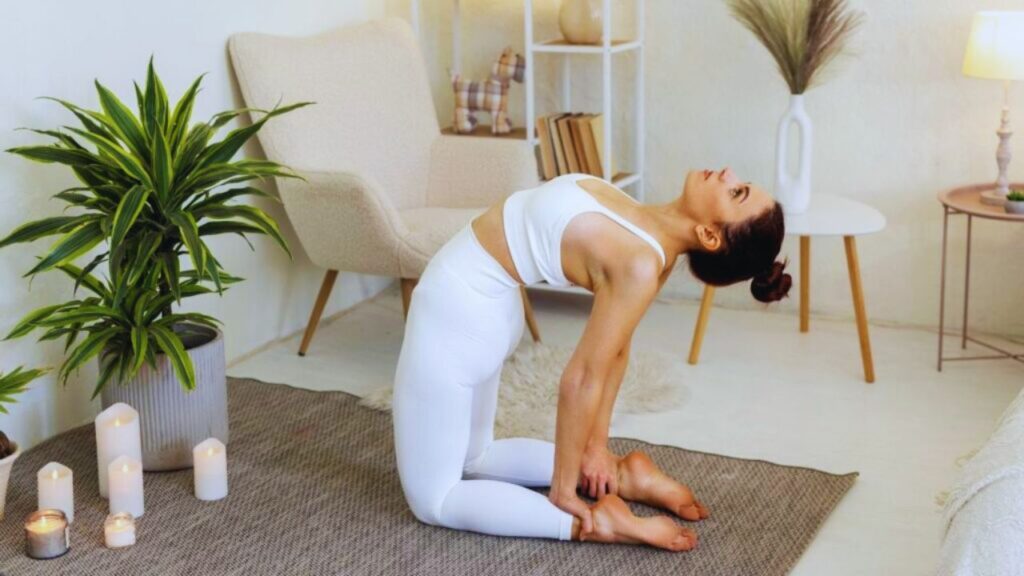
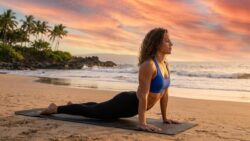
4. Cobra Pose (Bhujangasana)
Cobra Pose strengthens the lower back while stretching the spine. It’s ideal for relieving back pain and improving posture.
How to do it:
- Lie flat on your stomach with your hands placed under your shoulders and elbows tucked in.
- Slowly lift your chest off the ground by pressing your hands into the floor.
- Arch your back gently while keeping your elbows slightly bent.
- Hold for 15-30 seconds and then slowly lower back down.
# Benefits of This Exercise
This movement helps make your spine stronger while opening your chest area. When you practice it regularly you will notice improvements in how you stand and sit throughout the day. The exercise works by stretching the front of your body and engaging the muscles along your back. This combination creates better alignment from your head down to your lower back. People who spend long hours sitting at desks or looking at screens will find this particularly helpful. It counteracts the forward slouch that develops from these activities. Your breathing capacity can also increase because your chest has more room to expand. This means your lungs can take in more oxygen with each breath. The strengthening effect on your spine provides better support for your entire upper body. Over time this reduces strain on your neck and shoulders. Regular practice leads to a more upright & confident physical presence. Your body naturally maintains better positioning without you having to think about it constantly.
5. Seated Forward Fold (Paschimottanasana)
This seated stretch works to make your spine and hamstrings longer while helping your back & legs become more flexible.
How to do it:
- Sit on the floor with your legs extended straight in front of you.
- Inhale, lengthen your spine, and then exhale as you fold forward, reaching your hands toward your feet.
- Hold for 30 seconds to 1 minute.
Benefits: Stretches the spine, hamstrings, and back, improving overall flexibility.
6. Bridge Pose (Setu Bandhasana)
Bridge Pose works well for building strength in your lower back and glutes. At the same time it gently stretches your spine & chest. This exercise targets multiple areas of your body at once. The main focus is on making your lower back muscles and glutes stronger. While you hold the position your spine gets a mild stretch that feels good. Your chest also opens up during the movement. The pose is simple to do and gives you several benefits. Your back muscles become more stable and your glutes get firmer with regular practice. The stretching part helps improve your flexibility in the spine and chest area without being too intense.
How to do it:
- Lie on your back with your knees bent and feet flat on the floor.
- Press your feet into the floor and lift your hips towards the ceiling.
- Keep your arms by your sides or clasp your hands underneath your back.
- Hold for 20-30 seconds.
This exercise builds strength in your lower back muscles along with your glutes and leg muscles. At the same time it opens up your chest area and helps improve the alignment of your spine.
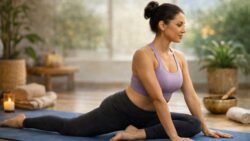
7. Spinal Twist (Supta Matsyendrasana)
Spinal twists work well to improve how your spine moves & reduce tightness in your back.
How to do it:
- Lie on your back with your arms stretched out to the sides.
- Bend your knees and gently drop them to one side, keeping your shoulders on the ground.
- Hold the pose for 30 seconds, then switch sides.
Benefits: Increases spinal flexibility, stretches the back, and relieves tension.
Tips for Practicing Yoga for Spine Health
- Focus on Alignment: Proper alignment ensures that you’re getting the most out of each pose and avoiding strain.
- Breathe Deeply: Deep breathing helps to relax your body and allows deeper stretches.
- Avoid Overstretching: Go at your own pace and avoid pushing your body too far beyond its limits.
- Incorporate Regular Practice: Consistency is key when it comes to improving flexibility and spinal health. Aim for at least 3-4 sessions per week.
Conclusion
Incorporating these essential yoga poses into your routine can have a profound impact on your spine health and flexibility. Whether you’re dealing with stiffness or simply looking to improve your overall posture, yoga offers an accessible and effective way to achieve lasting benefits for your spine.